Not sure what you’re actually signing up for when you book a shoot? That uncertainty is completely normal, especially the first time around. Working with a provider who offers professional car photography in Perth, WA means the session follows a clear, guided process rather than leaving you guessing. Here’s a look behind the scenes at how it all unfolds.
The Pre-Shoot Conversation
Everything starts with a conversation, well before anyone picks up a camera. This is where you talk through what you want the images to achieve and how you picture the finished result.
A few practical things usually get settled at this stage:
- The location, whether that’s a specific Perth backdrop, a studio-style setup, or somewhere with meaning to you and the car.
- The timing, since light quality changes dramatically across the day and shapes the mood of every frame.
- The look you’re after, from clean and technical to dramatic and moody.
Sharing reference images or describing what draws you to a certain style helps enormously. The clearer this conversation, the smoother the day runs.
Setting Up on the Day
When the session begins, shooting doesn’t start immediately. The first job is reading the environment and planning around it.
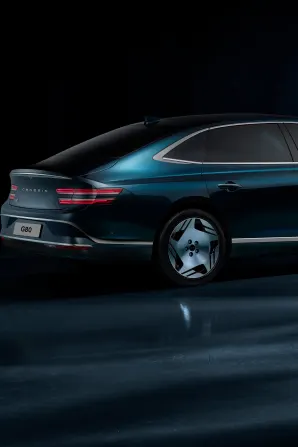
The photographer assesses where the light is coming from, how it interacts with the car’s paint and panels, and where reflections fall. Dark, glossy surfaces behave very differently to matte finishes, and both need thought before a single frame is taken.
The backdrop matters just as much. A cluttered background pulls attention away from the vehicle, so positioning the car relative to its surroundings is part of the setup. Expect some careful repositioning, small movements that make a noticeable difference in the final image.
By the time this groundwork is done, you should already have a good handle on how prepared the vehicle needs to be. If you want a refresher on getting the car itself ready, our guide on preparing any vehicle for a professional photo shoot covers that side in detail.
During the Session
Once shooting starts, the session tends to flow in stages. Wide establishing shots come first, capturing the car as a whole within its setting. From there the focus tightens.
A thorough shoot moves through a range of angles and details, such as:
- Front three-quarter and rear three-quarter views that show the car’s overall shape.
- Profile shots that emphasise proportions and lines.
- Close details like wheels, badges, grilles, interiors and stitching.
Your role during this is generally light. You may be asked to move the car, open a door or bonnet, or step out of frame while a sequence is captured. Otherwise, you can largely watch the process happen. There’s no pressure to direct anything, though your input is always welcome if you spot something you love.
How Long a Session Takes
Session length varies more than most people expect, because several factors pull on the schedule at once.
The main influences are:
- Light, since chasing the best conditions can mean waiting for the sun to sit right or working quickly during a short golden window.
- Weather, which in Perth can shift from clear to overcast within an afternoon.
- The number of angles and details you want covered, as a full walkaround takes longer than a handful of hero shots.
A focused session covering the essentials moves faster than one aiming for a broad, detailed set. Building in a little flexibility on the day almost always pays off.
After the Shutter Clicks
The raw frames captured on the day are only the starting point. The editing and selection stage is where the images really come together.
First comes selection, sorting through everything shot to find the strongest frames. Then editing refines each one, balancing colour, adjusting exposure, cleaning up distractions and drawing out the detail in paintwork and light. This is careful, considered work, which is why finished images don’t appear the instant the session ends.
Receiving Your Final Images
Once editing is complete, you receive your finished images in formats suited to how you plan to use them. High-resolution files work well for printing and portfolios, while web-optimised versions are ideal for listings and social media.
Knowing where the images will end up shapes what you get back, so it’s worth flagging your intended use early. That way the delivery matches the job, whether the photos are headed to a sale listing, a personal collection or an online showcase.
While this overall process stays broadly consistent from one booking to the next, the way it’s approached shifts depending on what the images are ultimately for. A sale listing, a personal portfolio and event coverage each shape the shoot in different ways, which is why it’s worth thinking about which kind of photography best matches your goal before you book.